Have You Updated Your Etsy Shop?

Shop Changes

It’s now been nearly 2 weeks since Etsy started rolling out their new shop design. If you haven’t yet, here are a few things you should check out or change:

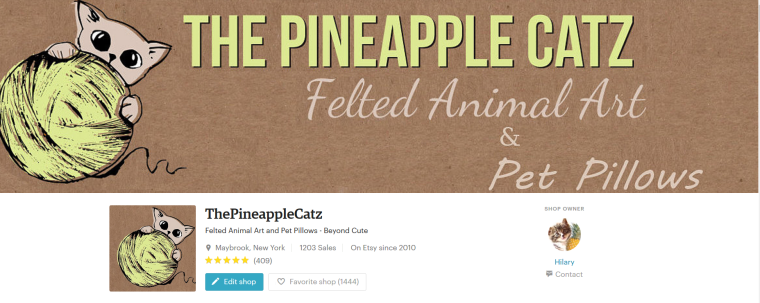
  • Change your banner. The new banner size is a minimum of 1200px by 300px. You should double check that it also looks nice on mobile! It may take some tweaking to get just right. I shared a screenshot of mine above but here’s another example of a great banner design.
  • You’ve chosen a shop icon right? If you haven’t, it won’t show anything but a grey shop! This should have been done a while back but now it is more front and center. We’re a bit guilty of waiting last minute to do it on our Vintage shop (we’re working on the banner at the moment)!
  • Check your policies. There was a lot of confusion about this early on about how Etsy would roll out their policies, if we would be forced to change, if we could change back. Scroll down to the bottom to make sure they’re how you want them to read.
  • Rearrange your shop. Optional of course, but with the new layout, like it or not, rearranging is a bit easier! Numbers have been added so you don’t have to drag and drop everything.
  • If you haven’t yet, try shop updates! They’re actually quite fun and will show up under your items.
  • Photos are more important than ever. Your products are showing up huge on your shop now, making them much more visible. Make sure they’re eye catching!

If you’re on the ball, you probably have most, if not all, of these covered already. But if you haven’t done it yet, it only takes a few minutes to take care all of these, especially if your photos are all up to date!

When Creativity Stagnates

light-bulbs-1125016_1920

Stagnates. I hate that word. I had to really think about using that word in the title. It didn’t take me long though to decide that that is the only word that fits.

When you want to come up with a new idea, a new product and all you’re doing is hitting a wall, it’s just like writer’s block. Or perhaps you just can’t seem to get motivated. The ideas are there, but you just can’t bring yourself to go to the work station today. It happens to me more often than not; my creativity comes in bursts. But I’ve found some ways to combat the stagnation.

Let me give you two examples of how MY creativity stagnates. The first one is when I just can’t get started. I sit down, I want to work, but I just can’t settle on an idea. I have an entire 2 inch binder FULL of drawings and ideas. I even have more on my Wunderlist on my iPad. And more in my head that I just never wrote down (horrible habit). Or wrote down and lost. But for some reason, none of them interest me. The second is when I have an idea, get half way through it, and either the project isn’t going perfect or suddenly my motivation just drops through the floor. A perfect example is a skunk I’ve had sitting at the bottom of my wool barrel for about six months. It’s really cute, but I messed up the fur. I could fix it, but I’m so annoyed at myself for messing it up that I put it into the pile for now. Eventually it will be finished but who knows when that will be?

So how do you combat this? Here are just four, simple suggestions.

1. Take a break.Ā Have you been crafting for days upon days and just haven’t taken a break? This might be all you need. Step away for a while; your creativity will wake up in it’s own time.

2. Write Down All Your Ideas. This is something that can be done all the time, creative or no. Don’t rely on your brain to remember it all. I couldn’t count the number of felted designs I’ve forgotten because IĀ didn’t write it down. There might be one item on that list that DOES spark your imagination. And for the love of God, keep it in one place! I wrote it down on a lot of scraps that ended up in the garbage.

3. Do Something Else Work Related. There are a TON of other things you could be doing work wise. Work on your social media. If you have an Etsy shop, try refreshing your about pages or doing a shop update. Do some research on local craft and art shows coming up.

4. Work On Simple Projects. You might just have to force yourself to work for some reason. Concentrate on the simpler projects. Ones that should get done, but might take less energy. For me, when my creativity is not there, forcing myself to work on a new or complicated sculpture would be the worst idea under the sun. It WILL turn out horrible and I’ll be in a worse mood than when I started. I usually take this time to turn on a movie or an audio book and work on the cores of birds, squirrels, and giraffes. My popular items that I know by heart without looking.


These are just four approaches to take when your creativity and motivation hits a snag. What do YOU do when you just can’t bring yourself to craft? Let us know in the comments!

Kit or Not To Kit?

Kit or Not to Kit

Are you thinking about offering your items in kit form? It’s a great way to get new attention to your products, but think carefully first if it is right for you! Take these tips into consideration before starting to put together that pamphlet!

1. Is It Worth It?

This is the first major question you need to ask yourself. Is it worth selling your items in a kit? For me, with my felted animals, the answer is yes and no. I tend to sell a majority of my items at cost, with a few more complicated, popular items with markup. Those complicated animals would be for more advanced felters and might not sell as well. But if the time ever comes when I raise my squirrels a bit more, those would make the absolute perfect kits.
Take into account the cost of materials and the time and effort into designing the tutorial. Don’t forget too to think about the cost of your expertise!

2. Just the Tutorial?

Maybe you don’t want to get all involved in that material buying (remember you’ll want to buy them at wholesale/reduced prices if you can!). Maybe you just want to deal with PDFs or Youtube videos. Or consider both as an option! Here are two examples:
1. For a cross stitch pattern, it would be best to probably just do the PDF of the design. Most likely, the artist has all the thread already needed or are just missing one or two.
2. For a felting pattern, you might want to sell them as “beginner kits”. That would include all the needles, foam, and colors they would need for the particular beginner project.

3. Can They Resell?

This is especially something to consider if you’re selling on an online marketplace like Etsy. A buyer might be hoping to resell their finished product in their own shop. This is completely up to you. Can they sell with slight changes or embellishments? Can they use it in a larger project? Or is it strictly for personal use only? Consider copyrighting your work and include a note that they cannot redistribute your tutorial.

Pricing To Pay The Bills

dollar-1009324_1280

This seems the be the big struggle for new handmade sellers all around the board -how to accurately price your items so you’re getting what you deserve. My best advice is to not fall into the “what would I pay for this” trap. But rather realize that just because you wouldn’t pay $10 for it, it doesn’t mean someone else wouldn’t pay the $25 it is actually worth.

Here are five tips and starting points to get you on the right track of pricing your items the RIGHT way!

1. Take Materials Into Account

This one should be obvious. For me, I have to think about how much wool I used (core vs. dyed), any embellishments, and the glass black eyes. Think about every step of making the product.

2. What About the Materials You Missed?

Did you sew the item? Did you take into account the sewing machine, the needles, etc? What about your camera to take the product photography? This takes some thinking about and you can use several guides to calculate your overhead to take those supplies into account that you take for granted. This Simple Biz Planning worksheet is a great place to start! For me, I have to remember to think about my felting needles and all the different types of mats I may have used.

3. Finishing Costs?

Are you paying for a website? Or selling on Etsy? You might have already included it in your “overhead costs” but don’t forget about any fees from Etsy, Amazon Handmade, Paypal, etc. Are you packing it up to mail or attending a fair? Either way, you have costs! For packing, think about the box, wrapping supplies, postage printing, and insurance. For a fair, you not only have the initial fee to take into consideration but also any decor you might be using (tent, table, shelves, etc).

4. Time Yourself!

This is the one most people skip or estimate on. I like to use a timer to see exactly how long it takes me to felt an animal. My projects tend to take anywhere from 45 minutes to 4 hours or longer. Multiply the number you get by your desired hourly wage.

5. Markup?

You have the base price of your items. Now think about markup! The prior four steps were all about how much work you personally put into the piece. Do you want to sell at cost? Or at a margin?

So You Want to Sell on Etsy ā€“ 10 Things I Wish I Knew ā€“ Part II

Part II

This is part 2 of a part 2 series! Click here for part 1.

6. Don’t Undersell Yourself– This is a lesson you need to learn fast or you won’t be able to stay in business long. Make sure to take overheard costs, materials, time, and profit all into account when figuring out how to correctly price yourself. Check to see what the competition does too, but don’t fall into the trap of undercutting yourself and losing out on money just to compete. Plenty of sellers underprice and don’t let their mistake hurt you! Having trouble figuring it out? There are plenty of calculators out there designed just for this, including this one from craftybase.

7. The Ins and Outs of the USPS- This will come with time as you get more experience, but do some research into the actual cost of shipping. As of the 17th, shipping prices actually increased, so stay on top of the latest news. See what shipping method (first class, media, priority) works best for you and your items. And don’t forget about insurance! If your item gets lost in the mail, you are responsible for it.

8. Choosing a Niche and Sticking With It – This might be already solved for you or you might still be struggling. You can certainly sell a little bit of this, a little bit of that, so feel free to do that! But in my experience, you bring in the most customers when you concentrate on one area per shop. Instead of having 10 items in Category A and 7 items in Category B, you can have 17 items under one roof. It also helps your shop look cleaner and more professional if all items are related. Since my shop is a Mother-Daughter effort, we do have a bit of two worlds, but we use the same material – wool.

9. The Exciting Christmas Rush- You probably won’t have to worry about this for a bit (seeing as it is only January anyway), but I had wished I had been more prepared for this! My first Christmas rush happened the second year my shop was open. I received so many orders, online and at a craft show, that I became overwhelmed with work for a bit. And every year it has become more and more busy, but I’ve come to expect it now! Have some stock saved up for October-December and start planning your Christmas designs even earlier. It WILL pay off!

10. Have Fun – I said this earlier in the post, but try not to think of this as a “Get Rich Quick Scheme.” Because in most cases, it won’t happen like that. Selling handmade items really takes effort, work, and growth. Even with these tips, you’re going to run into a dozen other issues that you weren’t even aware existed. So relax a bit, take a breath, and realize that it doesn’t have to happen TOMORROW. If you keep working at it and keep learning, you will be satisfied with the end result! Just don’t give up! And think about why you enjoy it so much šŸ™‚

**Have a tip of your own for new handmade sellers? Have an issue you’ve run into that you can’t quite solve? Leave it in the comments below!

So You Want to Sell on Etsy – 10 Things I Wish I Knew – Part I

patchwork-996552_1920

I started selling on Etsy five and a half years ago and my shop was nothing like it is today (which ALWAYS needs work). When I look back on that opening day, there were dozens of things I wish I had known before I had opened the virtual doors. The mistakes helped me learn, of course, but maybe you can learn from these early lessons of mine! This is part 1 of a 2-part series.

  1. It Takes Time – I can’t stress this enough. This is the number one killer of new Etsy shops. The forums are full of week old owners who wonder why they have not made their first sale yet. Sure, there are a few shops that get the sale on the second day, but that is not the norm. Your shop will require constant work, constant tweaking, and most of all, patience. Keep looking to get better! Don’t see it as a “get money quick”scheme. Be in it for the long haul.
  2. Don’t Skip Steps! – Don’t rush to get your doors open as fast as possible. Go through the steps Etsy provides. Fill out your shop announcement with relevant information, your about page, and your shop policies. Also make sure to choose a relevant avatar, banner, and shop icon. Not a graphic designer? There are plenty of sellers on Etsy who specialize in creating them!
  3. Shop Names are like Tattoos – Early on, when I joined, Etsy did not yet allow you to change your shop name. I was stuck with “SewingLoves” long after I had switched from sewing to felting. It is still important though. Take your time with this one. Write out your ideas and see which one speaks to you and represents your products. I would really compare this to getting a tattoo. The advice I gave my sister: Hang it on a wall for six months. If you can still stand it, get it. (Though I wouldn’t recommend waiting six months to choose your shop name! haha)
  4. Photographs Are Key – There are a lot of important aspects to creating a listing, but making sure your photographs stand out among the dozens of other products on the page is a huge step. Consider using a light box. There are several DIY guides online. Props can also help depending on the item. Never take your photo on the outside ground. And good lighting is the most important tool you have!
  5. Keywords are Just as Important – If you’re going to ignore all my other advice, do not ignore this one! SEO (Search Engine Optimization) is how your buyers will find you. This covers tagging, titling, and descriptions (as well as your shop information). Do your research! See what your competitors are doing but think “If I was a buyer, how would I search for this product?” Phrases are better than individual words. If you’re selling a red purse, use the phrase “red purse” rather than “red” and purse” separately. SEO deserves several of its own blog posts (and will get them).

I will cover the rest of “Things I Wish I Knew” tomorrow! Good luck on opening those shops!